翻訳は機械翻訳により提供されています。提供された翻訳内容と英語版の間で齟齬、不一致または矛盾がある場合、英語版が優先します。
# Apple Messages for Business の認証を有効にする
セットアッププロセスを開始するには、まず ID プロバイダーに移動します。
## ID プロバイダーの設定
次の Connect Customer ドメインは、認証に使用される ID プロバイダー (複数可) の許可されたリダイレクト URI として登録する必要があります。
```
https://participant.connect.{{region}}.amazonaws.com/participant/authentication/update
```
## Amazon Cognito との統合
[ID プロバイダーを既存の Amazon Cognito ユーザープールに追加する](https://docs.aws.amazon.com/cognito/latest/developerguide/cognito-user-pools-identity-provider.html)か、新しい [Amazon Cognito ユーザープール](https://docs.aws.amazon.com/cognito/latest/developerguide/cognito-user-identity-pools.html)を作成することができます。
このユーザープール内で、[アプリクライアント](https://docs.aws.amazon.com/cognito/latest/developerguide/user-pool-settings-client-apps.html)を作成し、一部またはすべての ID プロバイダーを選択できます。アプリクライアントのクライアント ID を書き留めます。このアプリケーションクライアントでは、次の Connect Customer ドメインを 許可されたコールバック URL として追加 する必要があります。
```
https://participant.connect.{{region}}.amazonaws.com/participant/authentication/update
```
**注記**
Amazon Cognito アプリクライアントの設定時に **[クライアントシークレットを生成しない]** を選択する必要があります。クライアントシークレットを使用しない Amazon Cognito アプリクライアントのみサポートされています。
## Apple Messages for Business のポータルで Amazon Cognito アプリクライアントを設定する
**[統合 OAuth2 認証]** で、Amazon Cognito アプリクライアントのクライアント ID を**クライアント識別子**として設定し、Amazon Cognito ユーザープールドメインの [認証エンドポイント](https://docs.aws.amazon.com/cognito/latest/developerguide/authorization-endpoint.html)を **OAuth URL** として設定します。

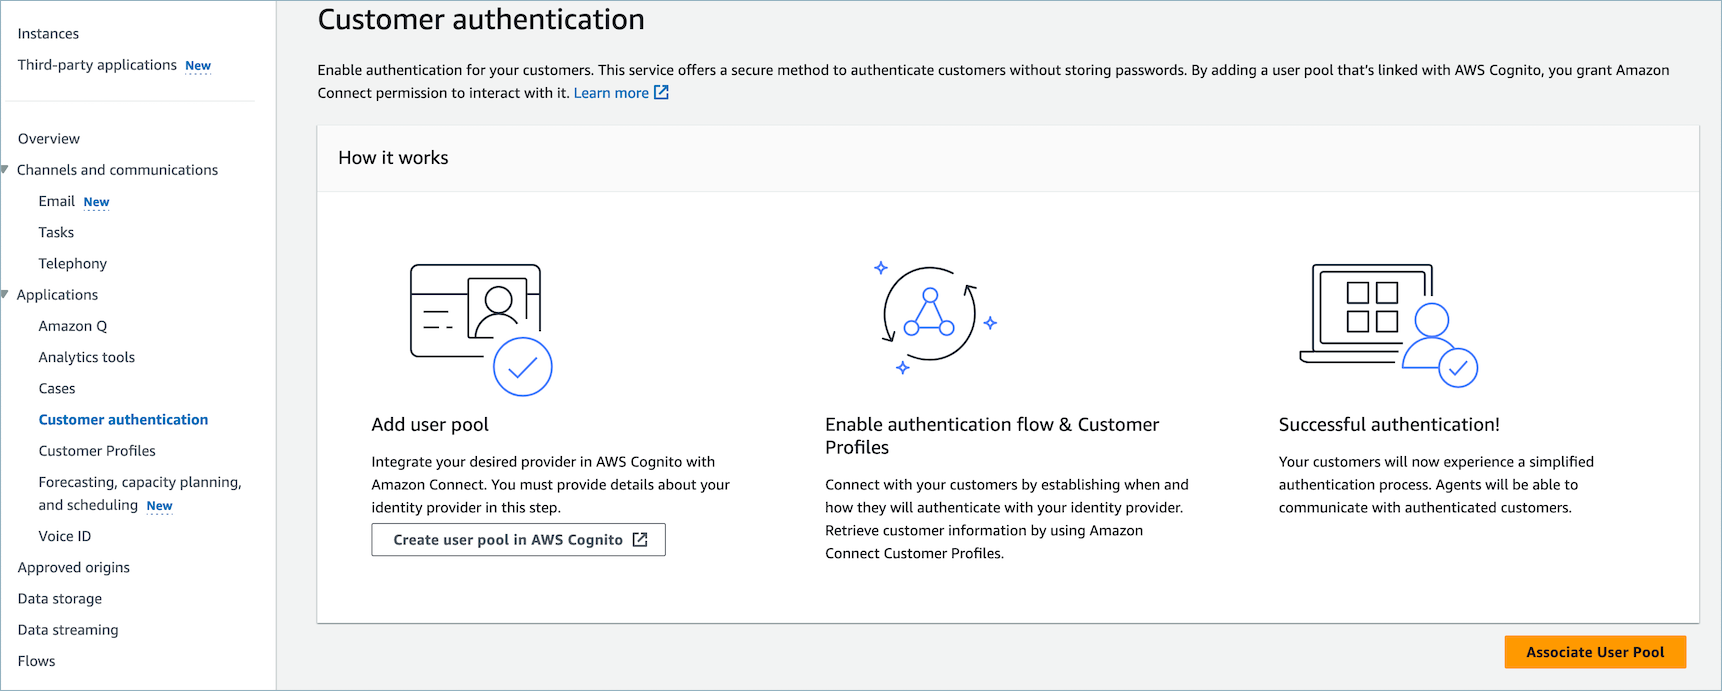
## Connect Customer でユーザープールを設定する
Connect **Customer** コンソールの Customer authentication ページで、認証に使用されるユーザープールを関連付けます。
## Connect Customer Customer Profiles を有効にする
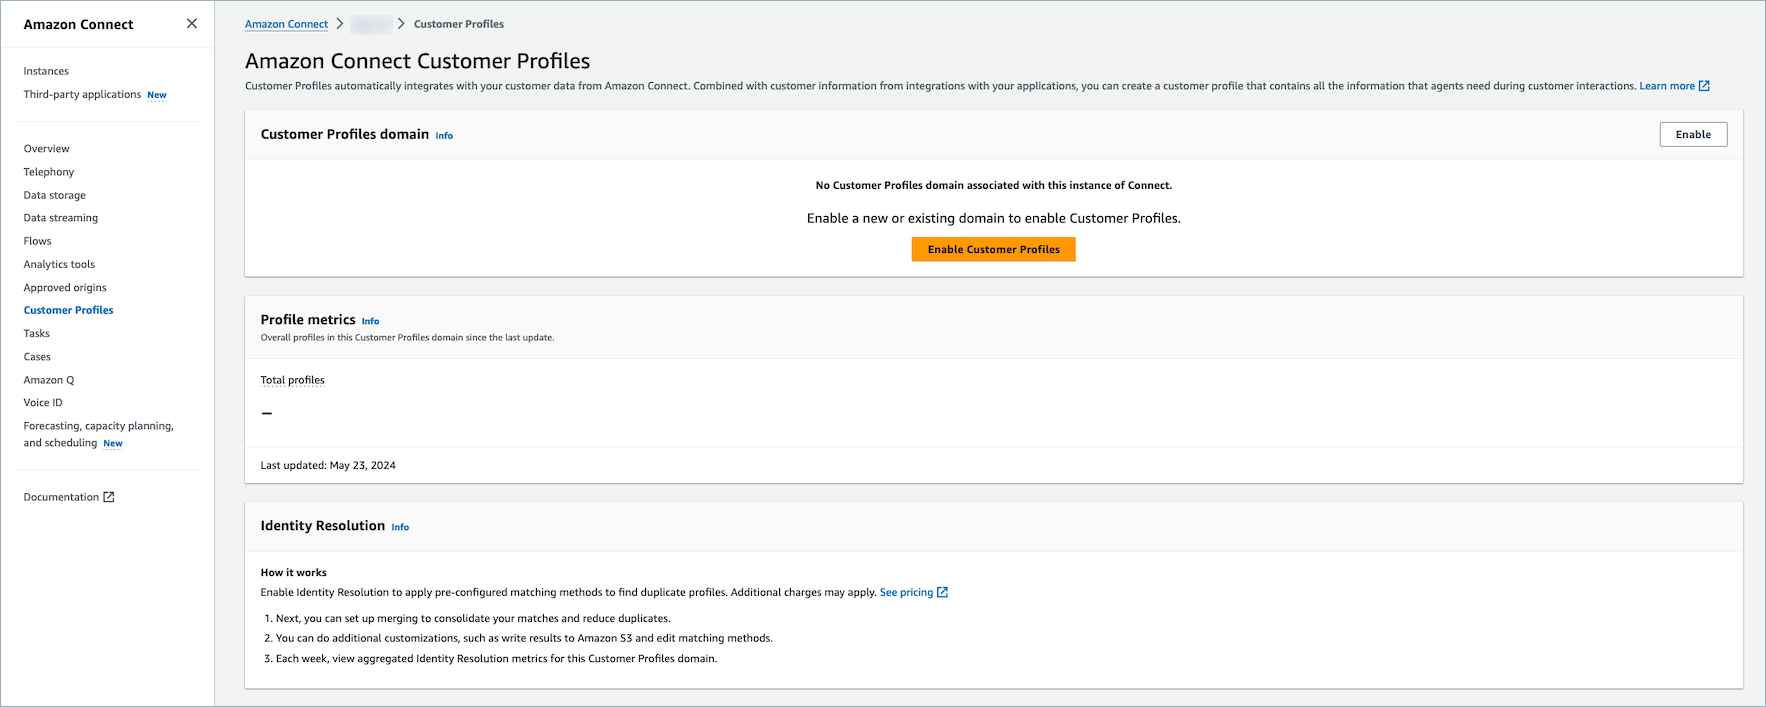
**Customer Profiles の有効化**
Connect Customer Console の Customer **Profiles** ページで、インスタンスで Customer Profiles が有効になっていることを確認します。**Connect Customer のこのインスタンスに関連付けられた Customer Profiles ドメイン**がない場合は、 「」を参照してください[Connect Customer インスタンスの Customer Profiles を有効にする](enable-customer-profiles.md)。
### セキュリティプロファイルに Customer Profile のアクセス許可 (複数可) を付与する (オプション)
エージェントワークスペースで Customer Profiles を表示/編集/公開するアクセス許可をユーザー (エージェント、管理者) に付与するには、「[エージェントの Customer Profiles アクセス許可を更新する](security-profile-customer-profile-agent.md)」を参照してください。セキュリティプロファイル (複数可) にアクセス許可を付与した後、ユーザーは エージェントワークスペースの機能にアクセスできるようになります。
アクセス許可の詳細なリストについては、[「Customer Profiles のセキュリティプロファイルのアクセス許可](security-profile-list.md#customerprofiles-permissions-list)」を参照してください。
## [顧客を認証] フローブロックを設定する
手順については、「[Connect Customer: Authenticate Customer のフローブロック](authenticate-customer.md)」を参照してください。